Вы не можете выбрать более 25 тем
Темы должны начинаться с буквы или цифры, могут содержать дефисы(-) и должны содержать не более 35 символов.
3.2 KiB
3.2 KiB
Connect a Microsoft Windows system to your Bubble VPN
Download the vpn.conf file
- Login to your Bubble
- Navigate to the Devices screen
- Find your device in the device list, or add your Windows system as a device
- Click or tap “Show VPN connection info” for your new Windows device. Click the button that reads “Download vpn.conf file”. A dialog will appear similar to the one shown below.
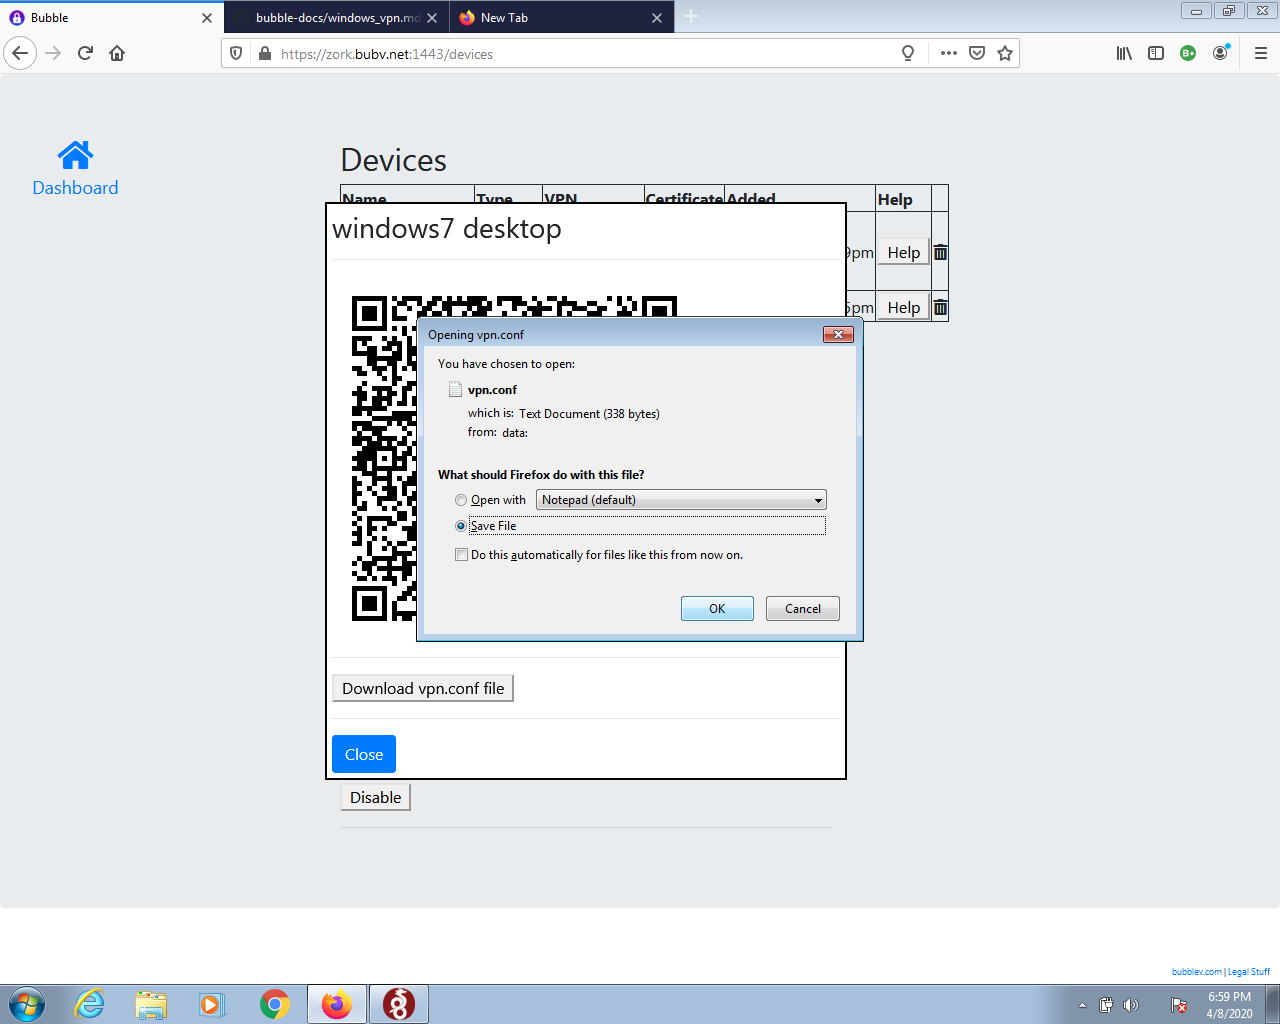
- Choose “Save File” and then click “OK” save the
vpn.conffile to your computer.
Install WireGuard
- Download and install WireGuard for Windows
- Note: If you are running a 32-bit version of Windows, you must install the 32-bit version of Wireguard
- Most newer Windows systems are 64-bit. To determine if your Windows is 64-bit or 32-bit, follow these instructions
- You can find more information about the WireGuard installers on the WireGuard Installation page
- Run the WireGuard msi installer that you just downloaded. You’ll see a screen similar to the one shown below.
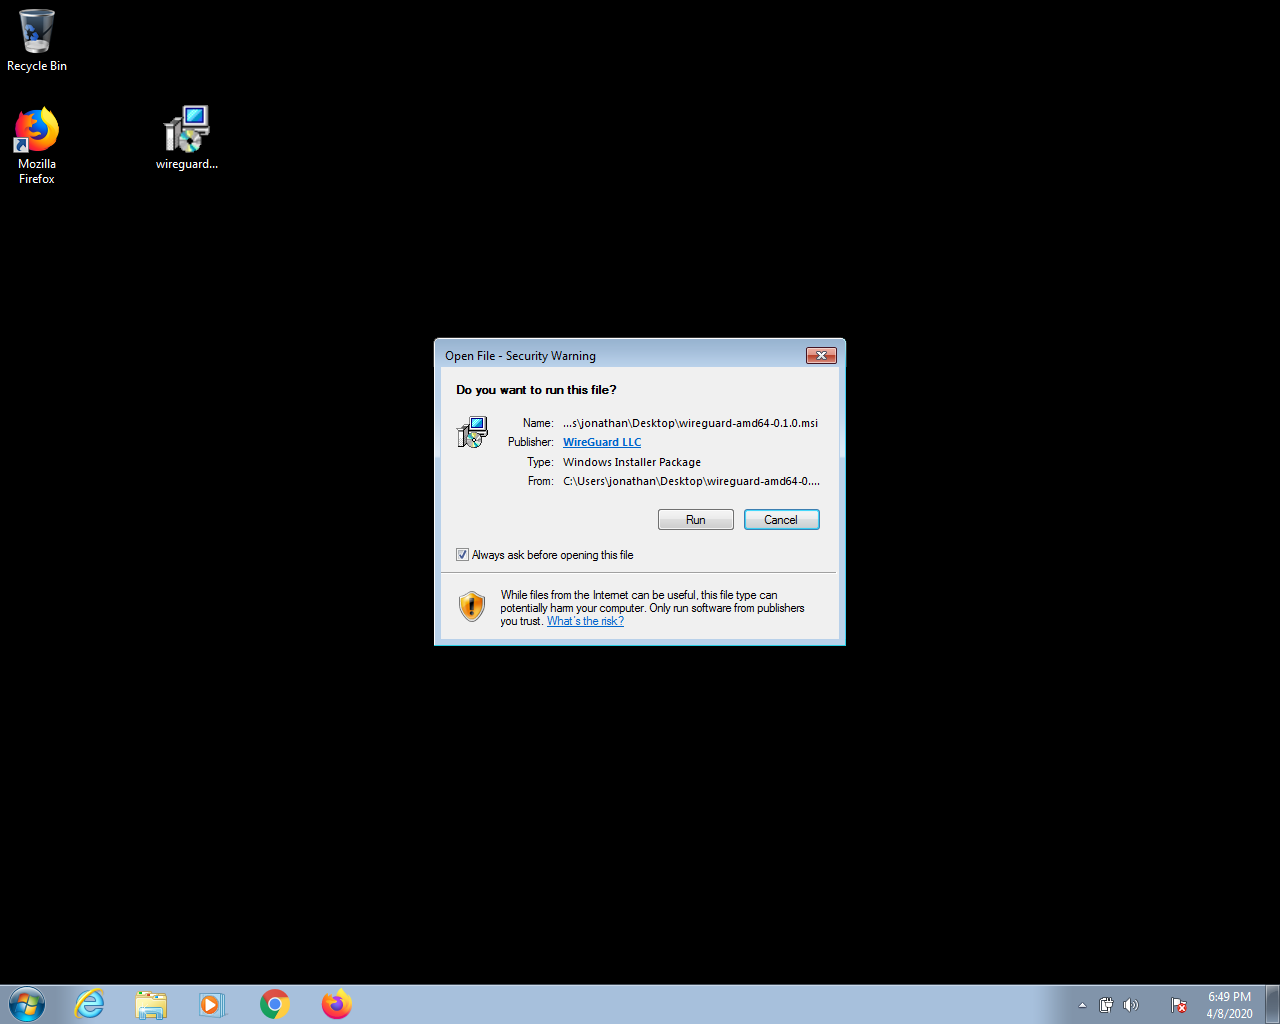
- Click “Run”
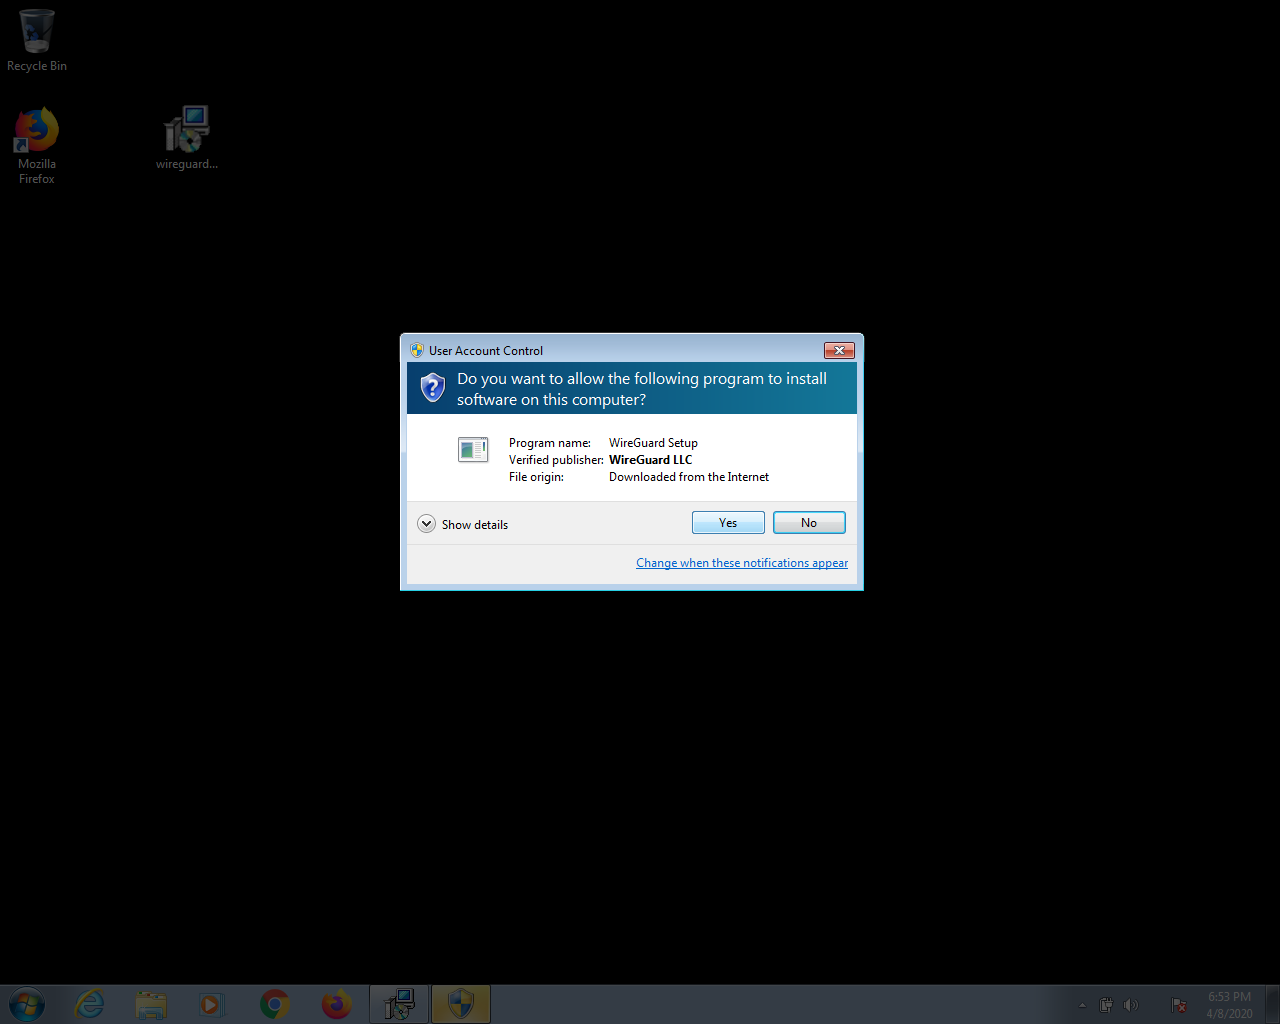
- Click “Yes”
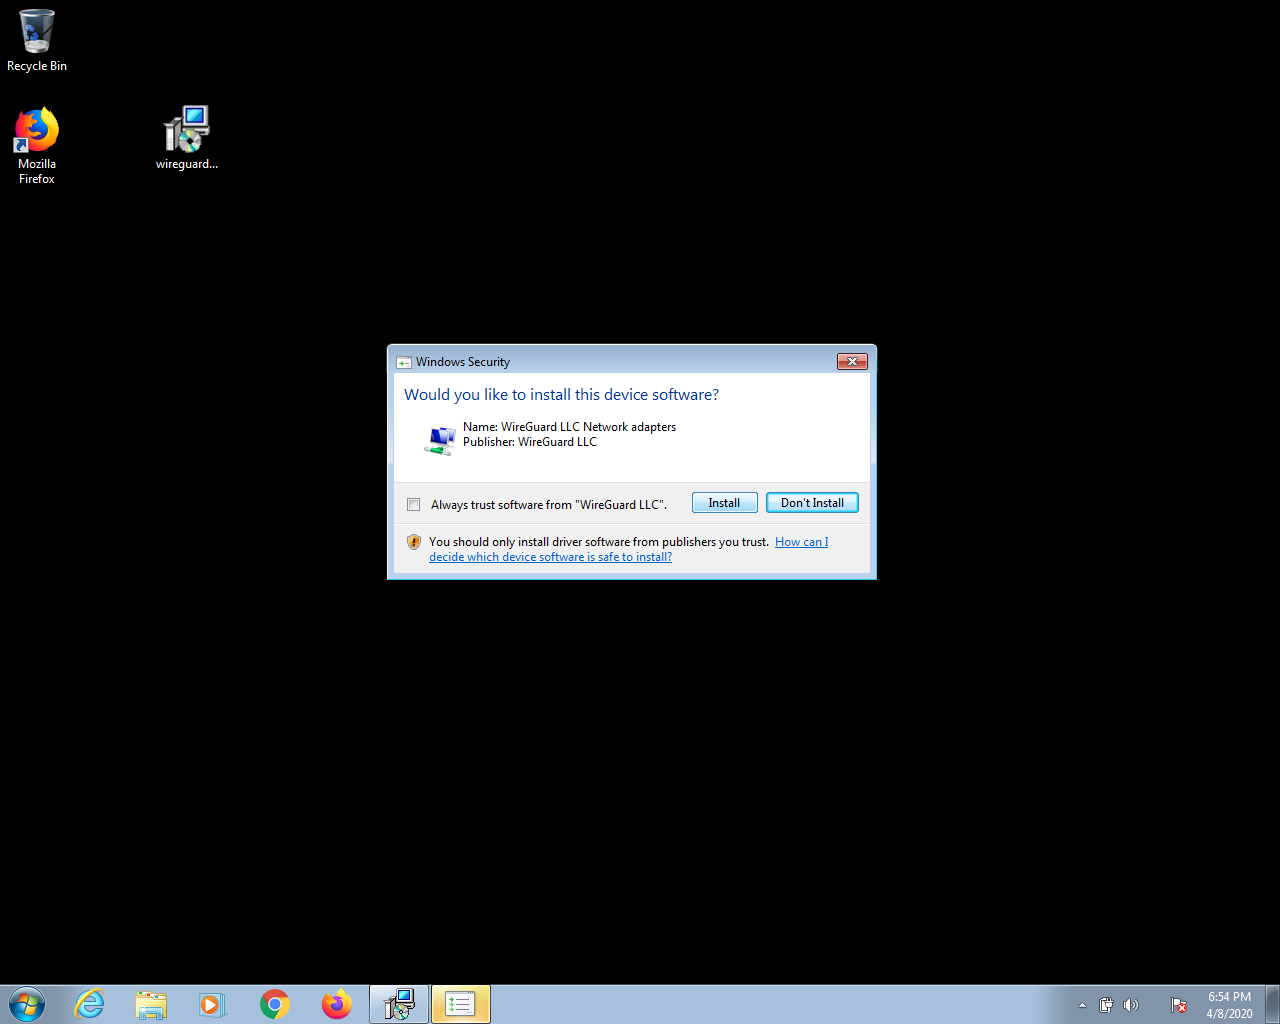
-
Click “Install”
-
The WireGuard application then opens, and you should see a screen like the one below.

Connect to Bubble via WireGuard
- In the WireGuard application, click “Import tunnels(s) from file”. A file dialog will appear. Select the
vpn.conffile that you downloaded earlier. You should now see a screen like the one shown below.
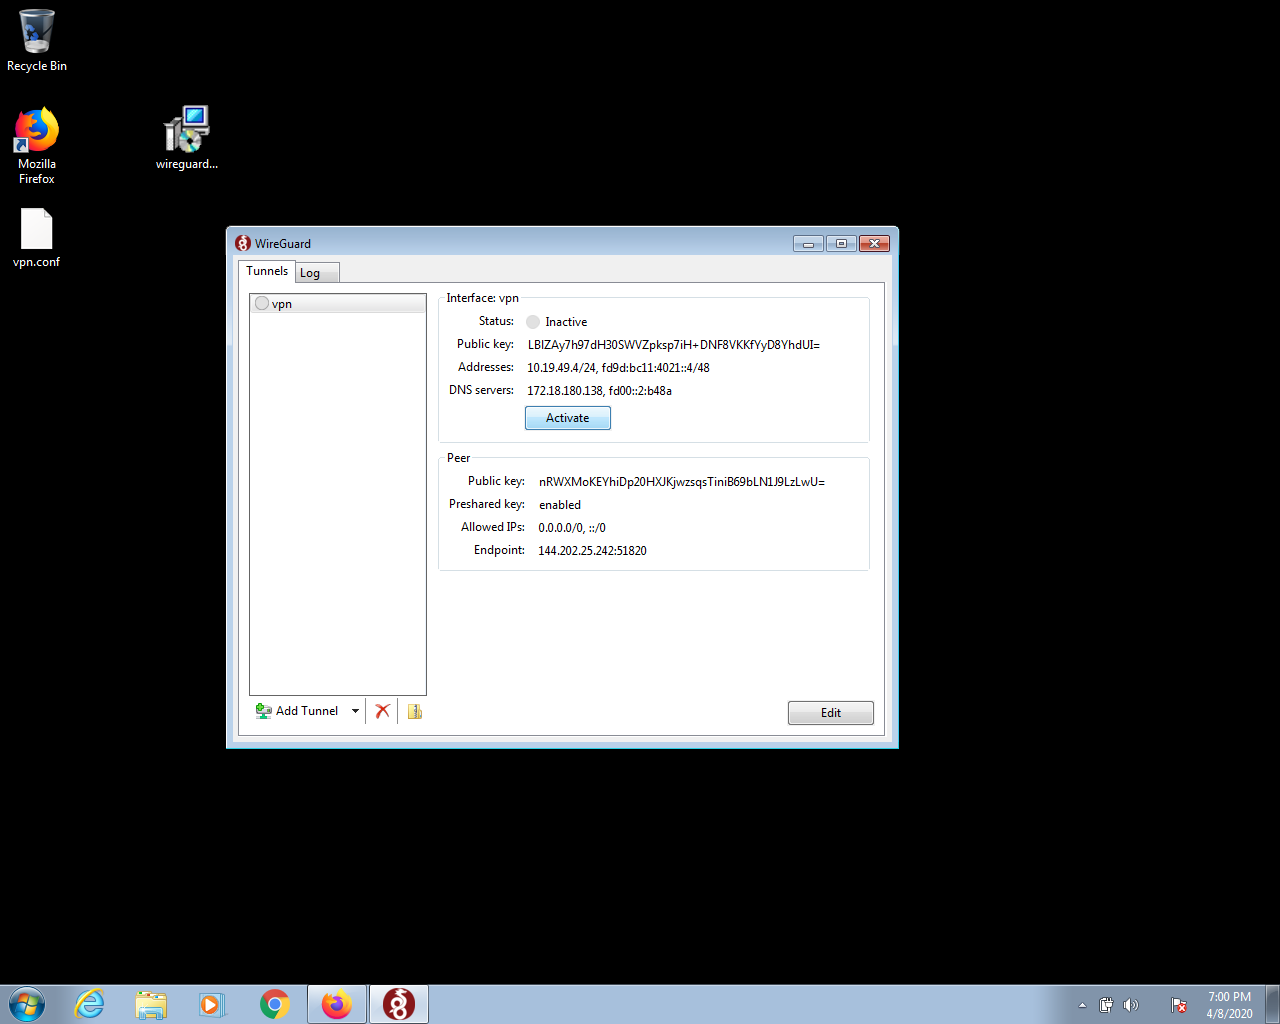
- Click the “Activate” button to connect to the VPN.
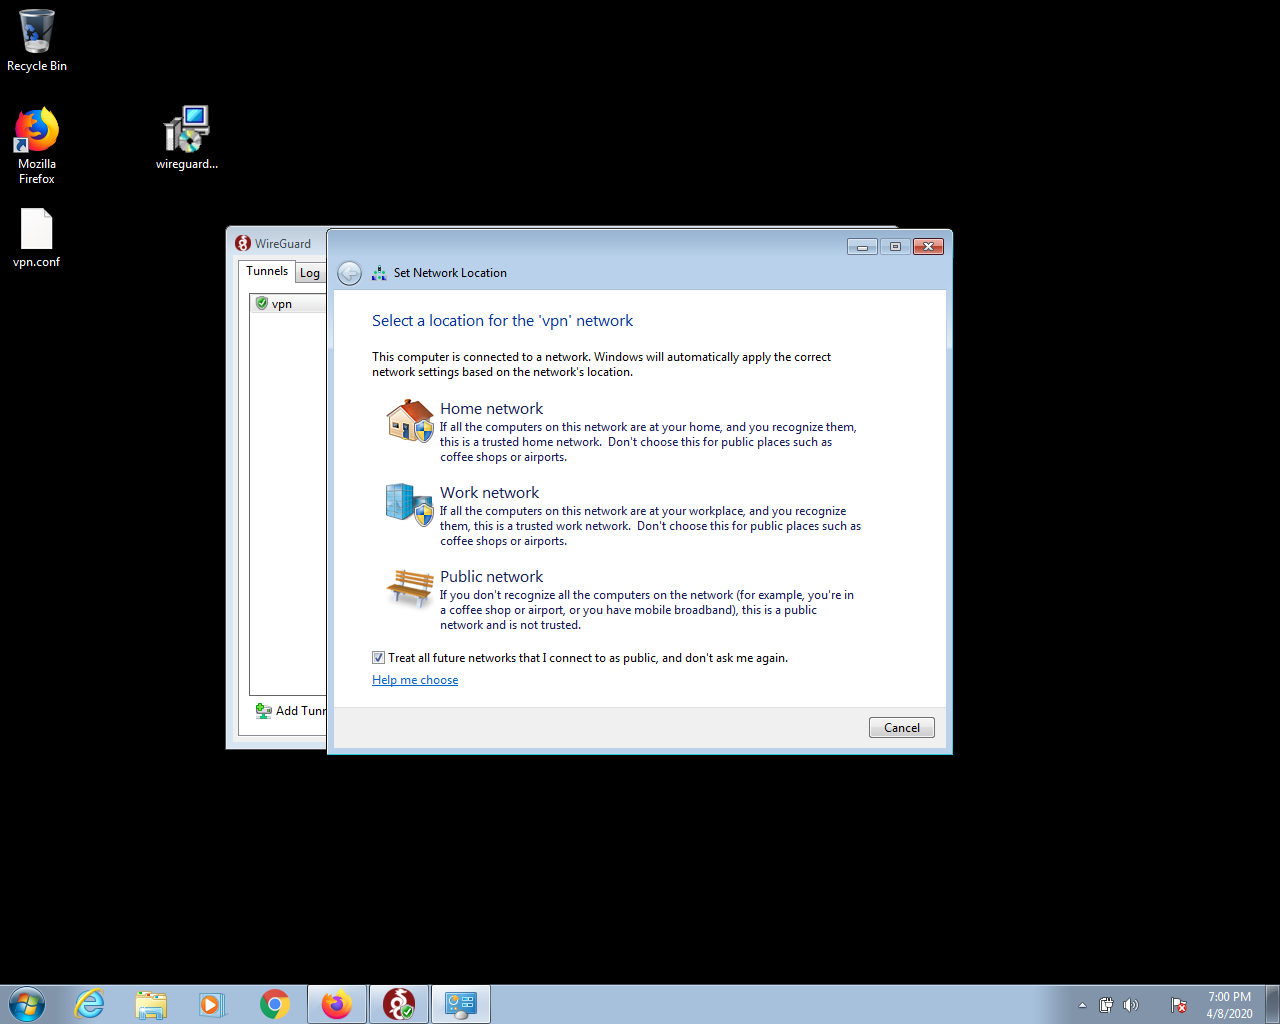
- You should now see a “Set Network Location” dialog, like the one shown below. Click on “Public network”, then click the “Close” button.
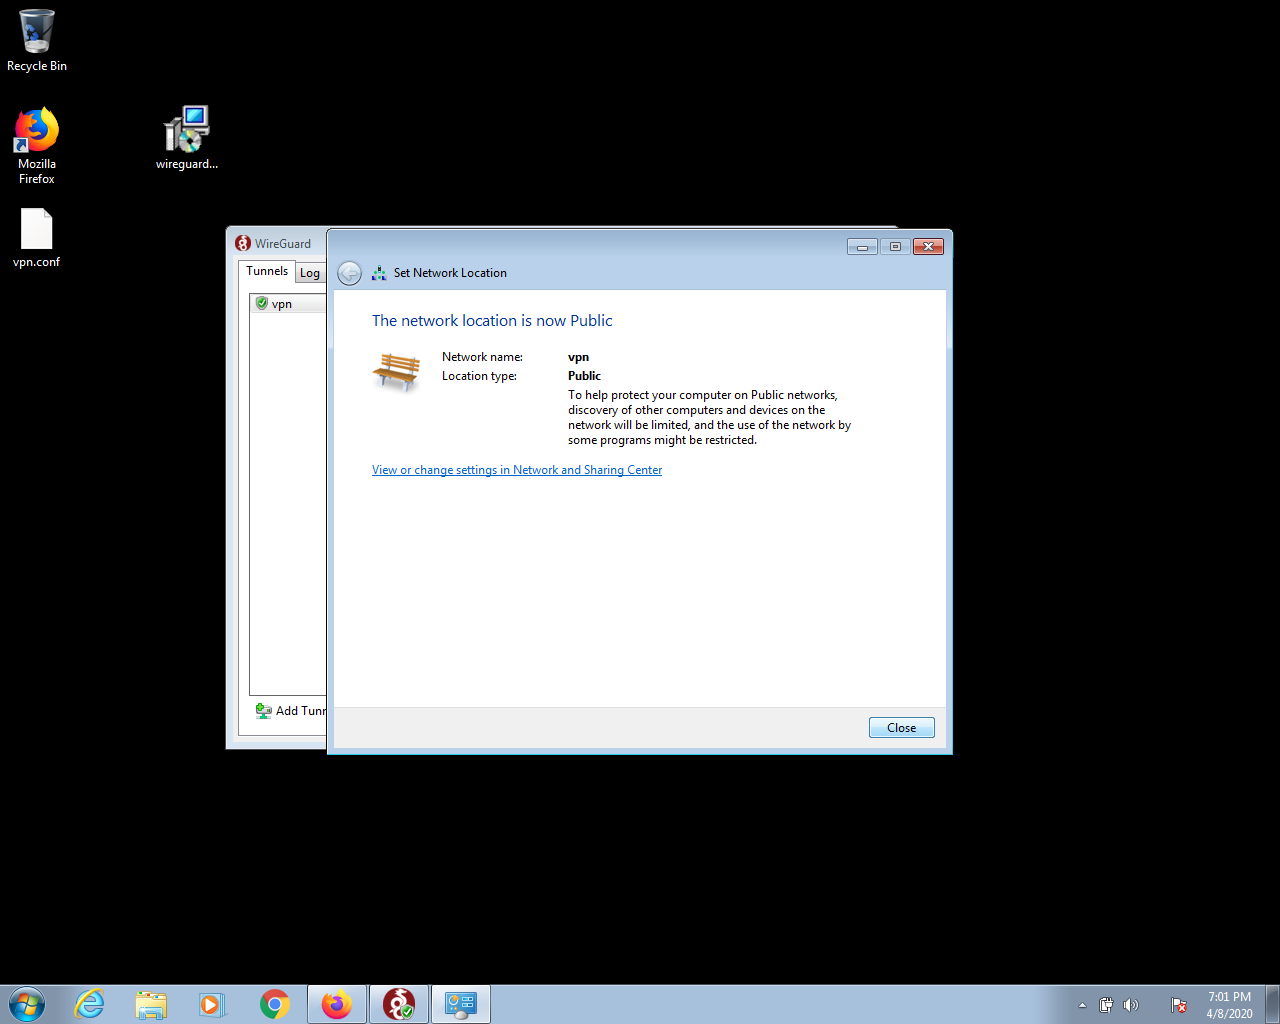
- The next screen will ask you to confirm this network location. It should look like the screenshot below. Click “Close”.
- Congratulations! You are now connected to your Bubble’s VPN!
